
“Ooh move! I wanna see the bride’s gown!”
We all know that people stand for the arrival of the brides to catch a glimpse of her dress – at least the girls do. Trying on the pretty gowns is also probably the best part of wedding planning. I thought I would be one to spend hours/days/months visiting and re-visiting bridal shops before I’d settle on ‘the one’ but it only took me 20 minutes to find my fixer-upper dress (very excited about it!)
But I had an easier time picking my gown because I planned to wear multiple dresses – one for every season of the year 🙂
For the summer dress, my inspirations are:

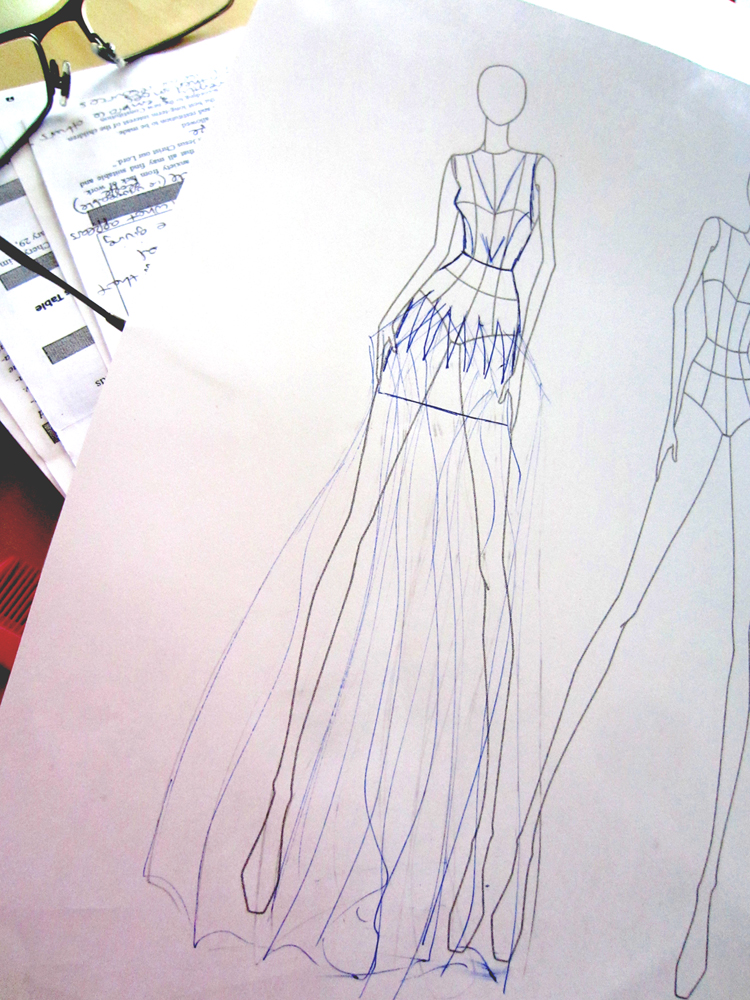
I loved the Kate dress by Ellebay Bridal with the flowiness and the lace. But when I saw the BCBG gown, I knew that would be perfect for a summer, beach wedding. Especially with the light organza which doesn’t restrict movement and would not weigh me down if I wanted to walk into the water.
So a quick sketch to plan out how to connect my favourite elements of both gowns –
Fabricana is like my candy store. I can spend hours in there – three to be exact. You have no idea how hard it is to find beautiful lace. The pattern I picked was a very common one that comes in many colours for a reasonable price. Organza was on sale so bonus for me!
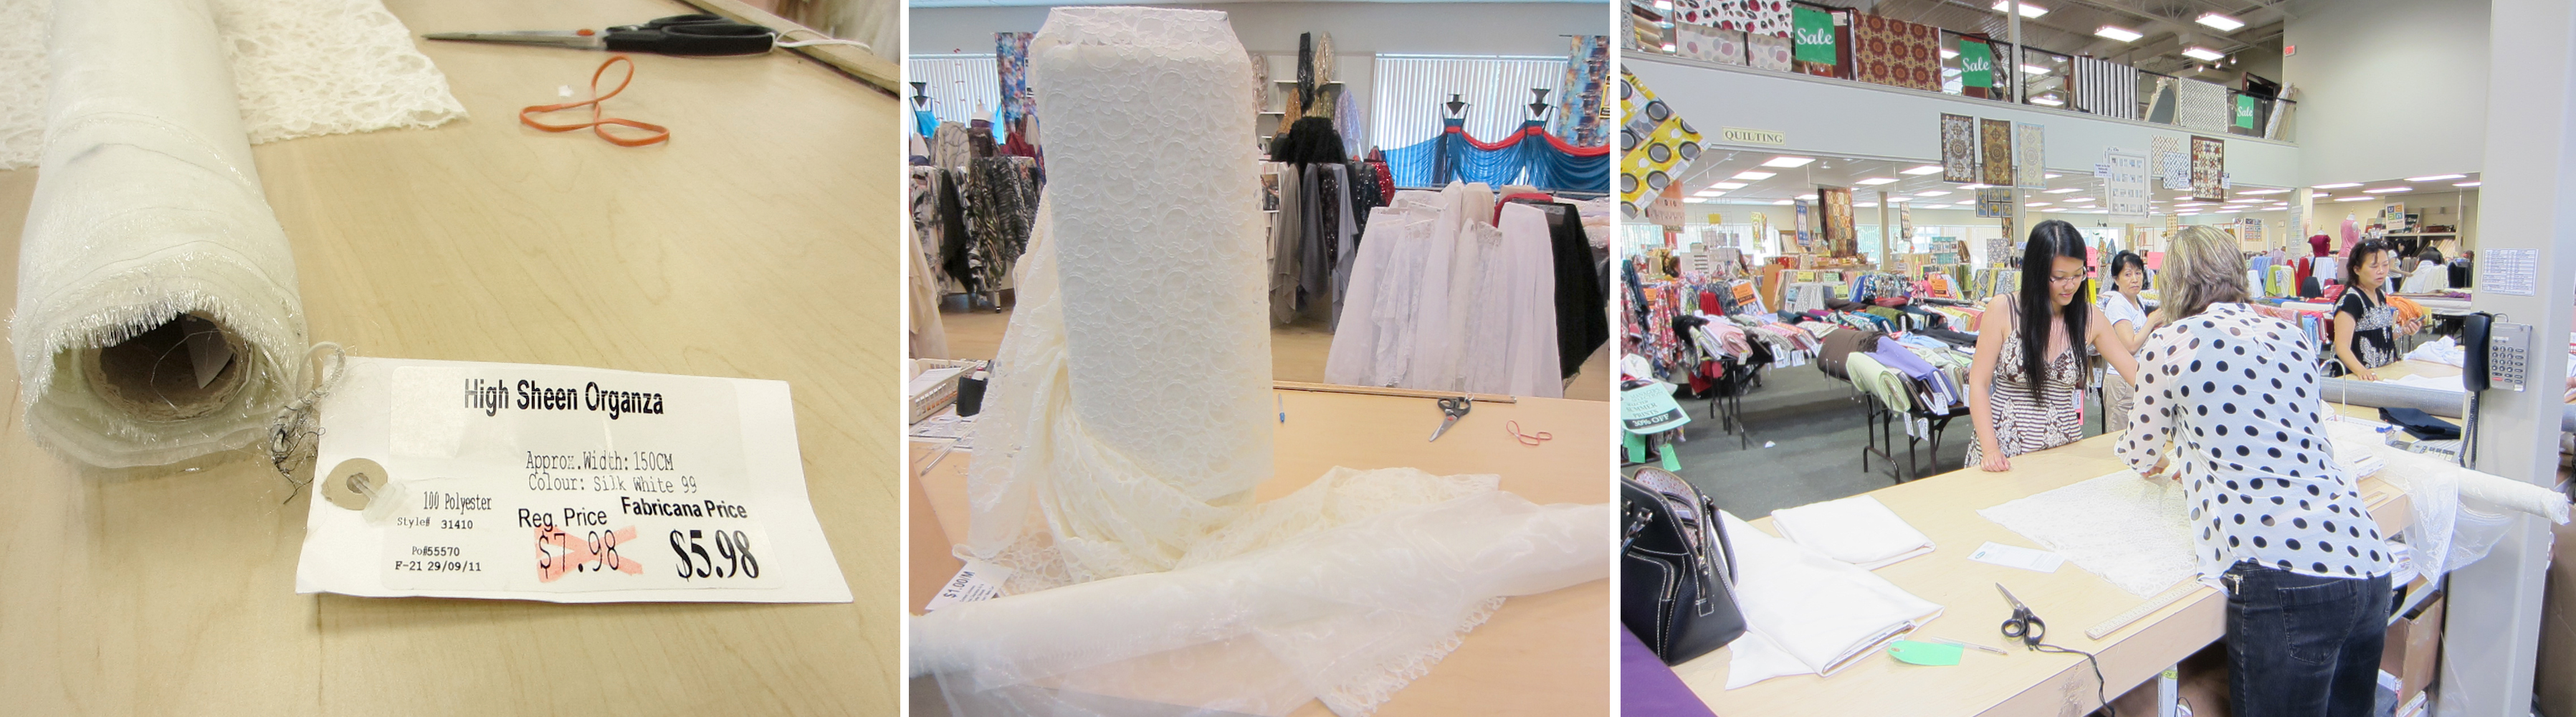
After picking up lining and notions, I was ready to start!
There are many sources on YouTube, even for the untrained DIY bride, to figure out how to create a pattern from a dressform.
1) Place muslin fabric (or any non-stretch scrap material) and pin onto the lines you marked. Cut off whatever you don’t need! Do this for half of the dressform. You simply need to double it when you cut the fabric to create the other side and it will be symmetrical.

2) Remove the muslin pieces from the dressform and trace on paper, adding 1.5cm seam allowance around the edges. Mark the corners, notches, darts, etc. Place onto fabric and lining and cut.
")
3) Sew the bodice and skirt pieces separately. Attach the bodice to the lining and make sure it fits! Add bias tape to the waist of the lining to prevent stretching.

4) Pin the bodice onto the dressform and drape the lace over it. Pin in place, creating the form of the body. Using similar coloured thread that blends into the lace, handstitch it onto the bodice and onto the skirt.
With right sides together and the bodice in between them, stitch together the skirt to the lining. Add invisible zipper to the back.

5) Tear the strips of organza by hand. Since it’s woven, non-stretch material, it rips very well and ends up perfectly straight. Create a rolled hem all around the edges of the strips using a serger. Fold the strips in half and press with an iron – props to Ursula for doing all of this part!
Pin onto the hip of the dress to determine the distance between each strip. Take it off the dress and connect them all together by stitching 5cm between them (imagine being little people holding hands).
Pin the strips back onto the dress and space them out evenly. Handstitch each piece into place.
So now comes the problem solving part of DIY projects, especially if you’ve never done them before:
- The strips looked like an accordian after tacking it in place, not at all like the BCBG dress. I played around with it a bit and pulled down each strip slightly, rolled it behind and tacked in place. Looked more like a pumpkin after that but much cuter and I didn’t mind the reference since it reminded me of Cinderella 🙂
- The sides were too bare and every time I bent my body, I would flash someone so I took some spare lace lying around and handstitched in onto the sides to close it off and add a bit of embellishment.
- Ursula noted that there was something missing and said I should add a sash because the waistline looked bare and incomplete. I felt a sash would add too many varying materials into the dress and cheapen the look. So I dug around and found this $5 faux pearl necklace I thrifted when I was visiting Oregon coast. Lo and behold, not only is it the perfect addition the dress, the length fits around perfectly!!!

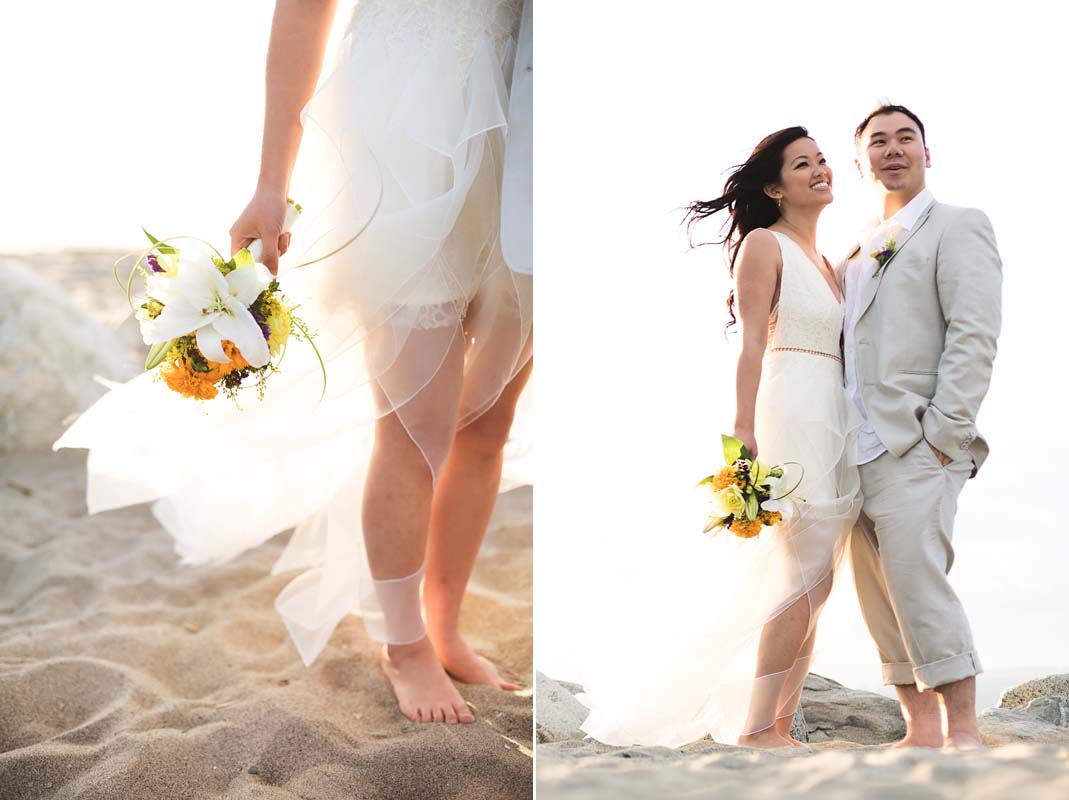
And *drum roll* the final product!
Total cost was about $55. Not too shabby!

I was extremely happy with the product and I finished it not a moment too soon – on the day of the photo shoot.
Photographer – Jun Ying of Kunioo assisted by the talented Miya Gu
Bouquet/boutonniere – Lisa Wong of Blush Floral Designs
Makeup/hair/styling – Elena Tsang (me!)
Special thanks to – Sam Chin for the suit; Ursula Tsang for assisting me in this project; Brenda Tsang-Chu for baking delicious treats used as props in the shoot; Jason Fung for being an awesome fiance and prepped the other props for the shoot.
Enjoy some pictures of it flowing in the wind!


I don’t even know how I ended up here, but I thought this post was good. I do not know who you are but certainly you’re going to a famous blogger if you aren’t already 😉 Cheers!
that’s sweet! i’m definitely not a famous blogger at all but i appreciate the compliment 🙂
This looks magnificent and is a true one of a kind! I love the pleats around the waist – they’re so flattering on you. I’m so proud of you and am wow’ed by your creativity. 🙂 Wishing you all the best for your wedding day.
thanks mel! i’m having a lot of fun (albeit a bit stressed) planning and making all this for the big day.
p.s. i love your vegetable bouquet 🙂