
We’re already getting some spring sunshine and the cherry blossoms are peeking from it’s bud but I’ve yet to post up the winter gown!
So here we go! My inspiration initially was the Oscar de le Renta gown with relatively sturdy lace and flowy back. I attempted to recreate and rather than drafting it from scratch, I bought a pattern with a similar shape and thought to alter it later.
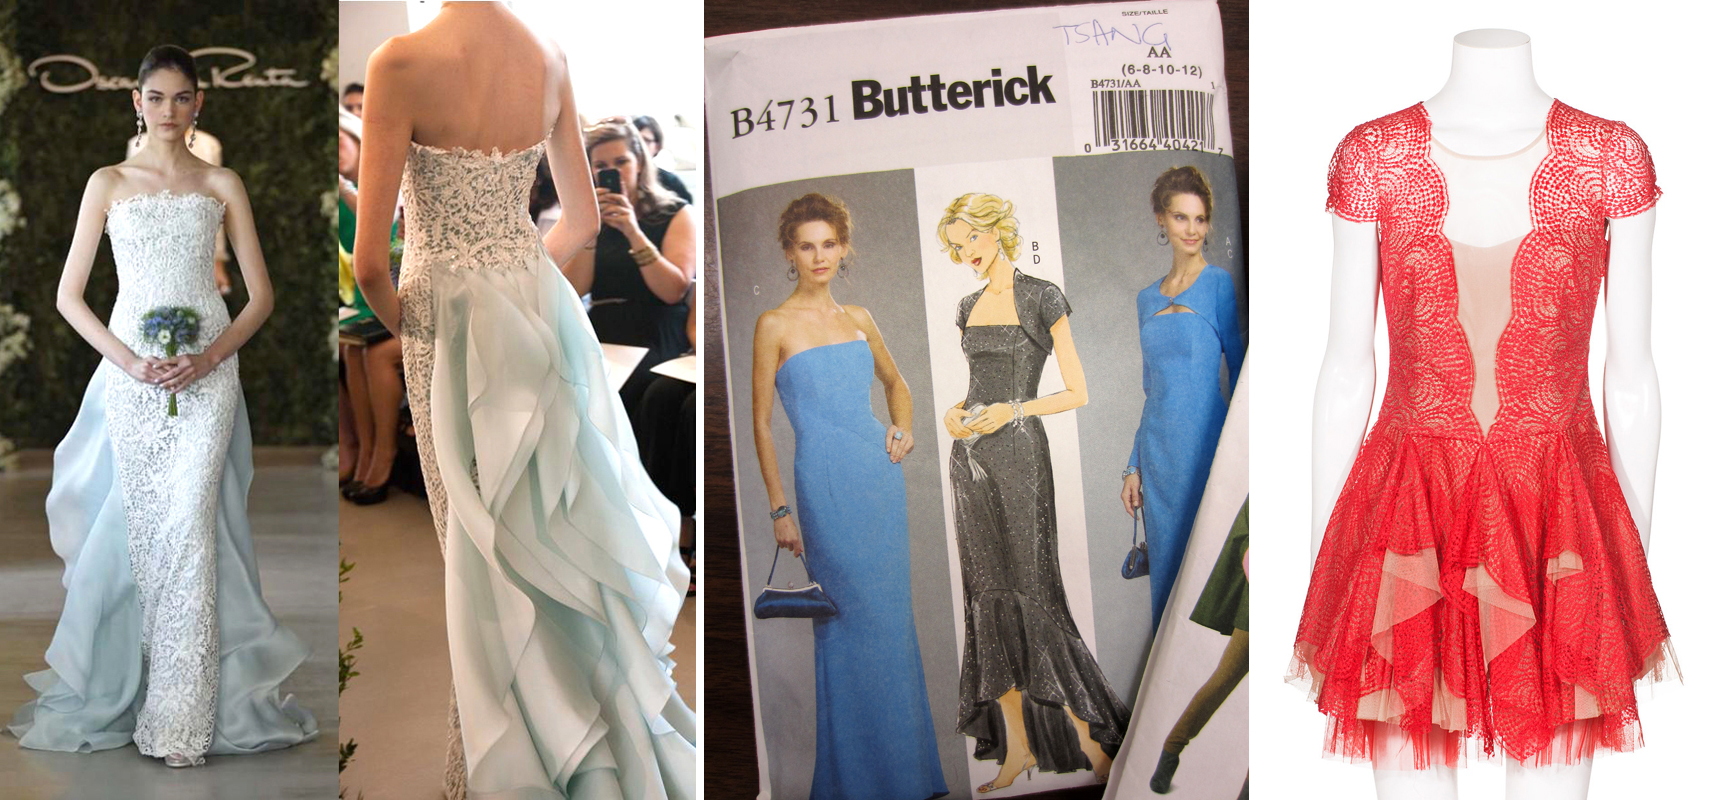
After doing some shopping, I realize that the lace to make that dress cost minimally $80/meter and the amount of fabric to create the flow would be just as extravagant. That being said, all Oscar de la Renta gowns start at $5500 so either way it’ll be a steal.
Searching for more inspiration, I just went gown shopping and found the red dress by BCBG (somehow not on their website) which retails just under $400. I liked the fulllness from the layering so I thought I could still incorporate the blue (winter theme colour) into those layers.
One thing I hate about patterns – the sizes always fit way bigger than it says. So according to my measurements, and throwing together a quick muslin, I ended up being able to wear the dress with room to spare with all my clothes underneath. So I pinned it to a professional dressform with similar measurements to mine.

Then altered the patterns based on the amount I pinned away.

And then made two versions – dress and lining – and the foundation with boning to keep the dress from slipping down. Finally, hand-stitching the lining to the zipper so it’ll be invisible and perfect!

And FAIL!!!! Not to intentionally flash boobs, but look at the horrendous shape it gives the bust. I could barely look at it without almost crying.

I couldn’t continue with making the dress knowing how it’ll look. But at the same time, didn’t want to start from scratch after hours (every evening for a week) of work I put into it. At the end of the day, sucking up and learning from my mistakes was the only option.

So I put a bra on the dressform and stuffed it, ran several muslins through until it fit properly, and then made the foundation first to make sure it looks good on. Instead of doing a regular lining, I made it with white flannel to add an extra layer of warmth and softness since I knew that the location of the shoot would be somewhere freezing cold. Jason really pulled through here and helped me through a few hours of cutting and marking each new piece.
And finally…
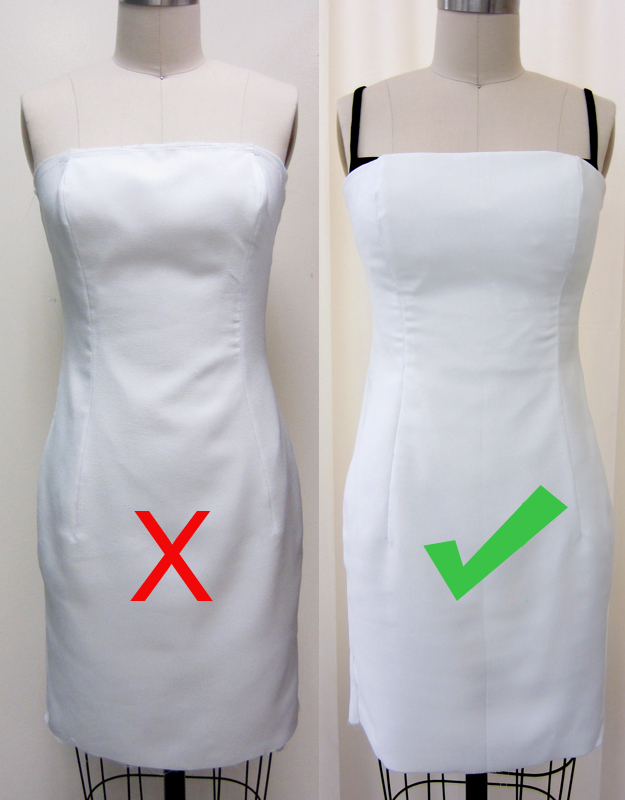
See the difference? The angels are singing and beams of lights everywhere!
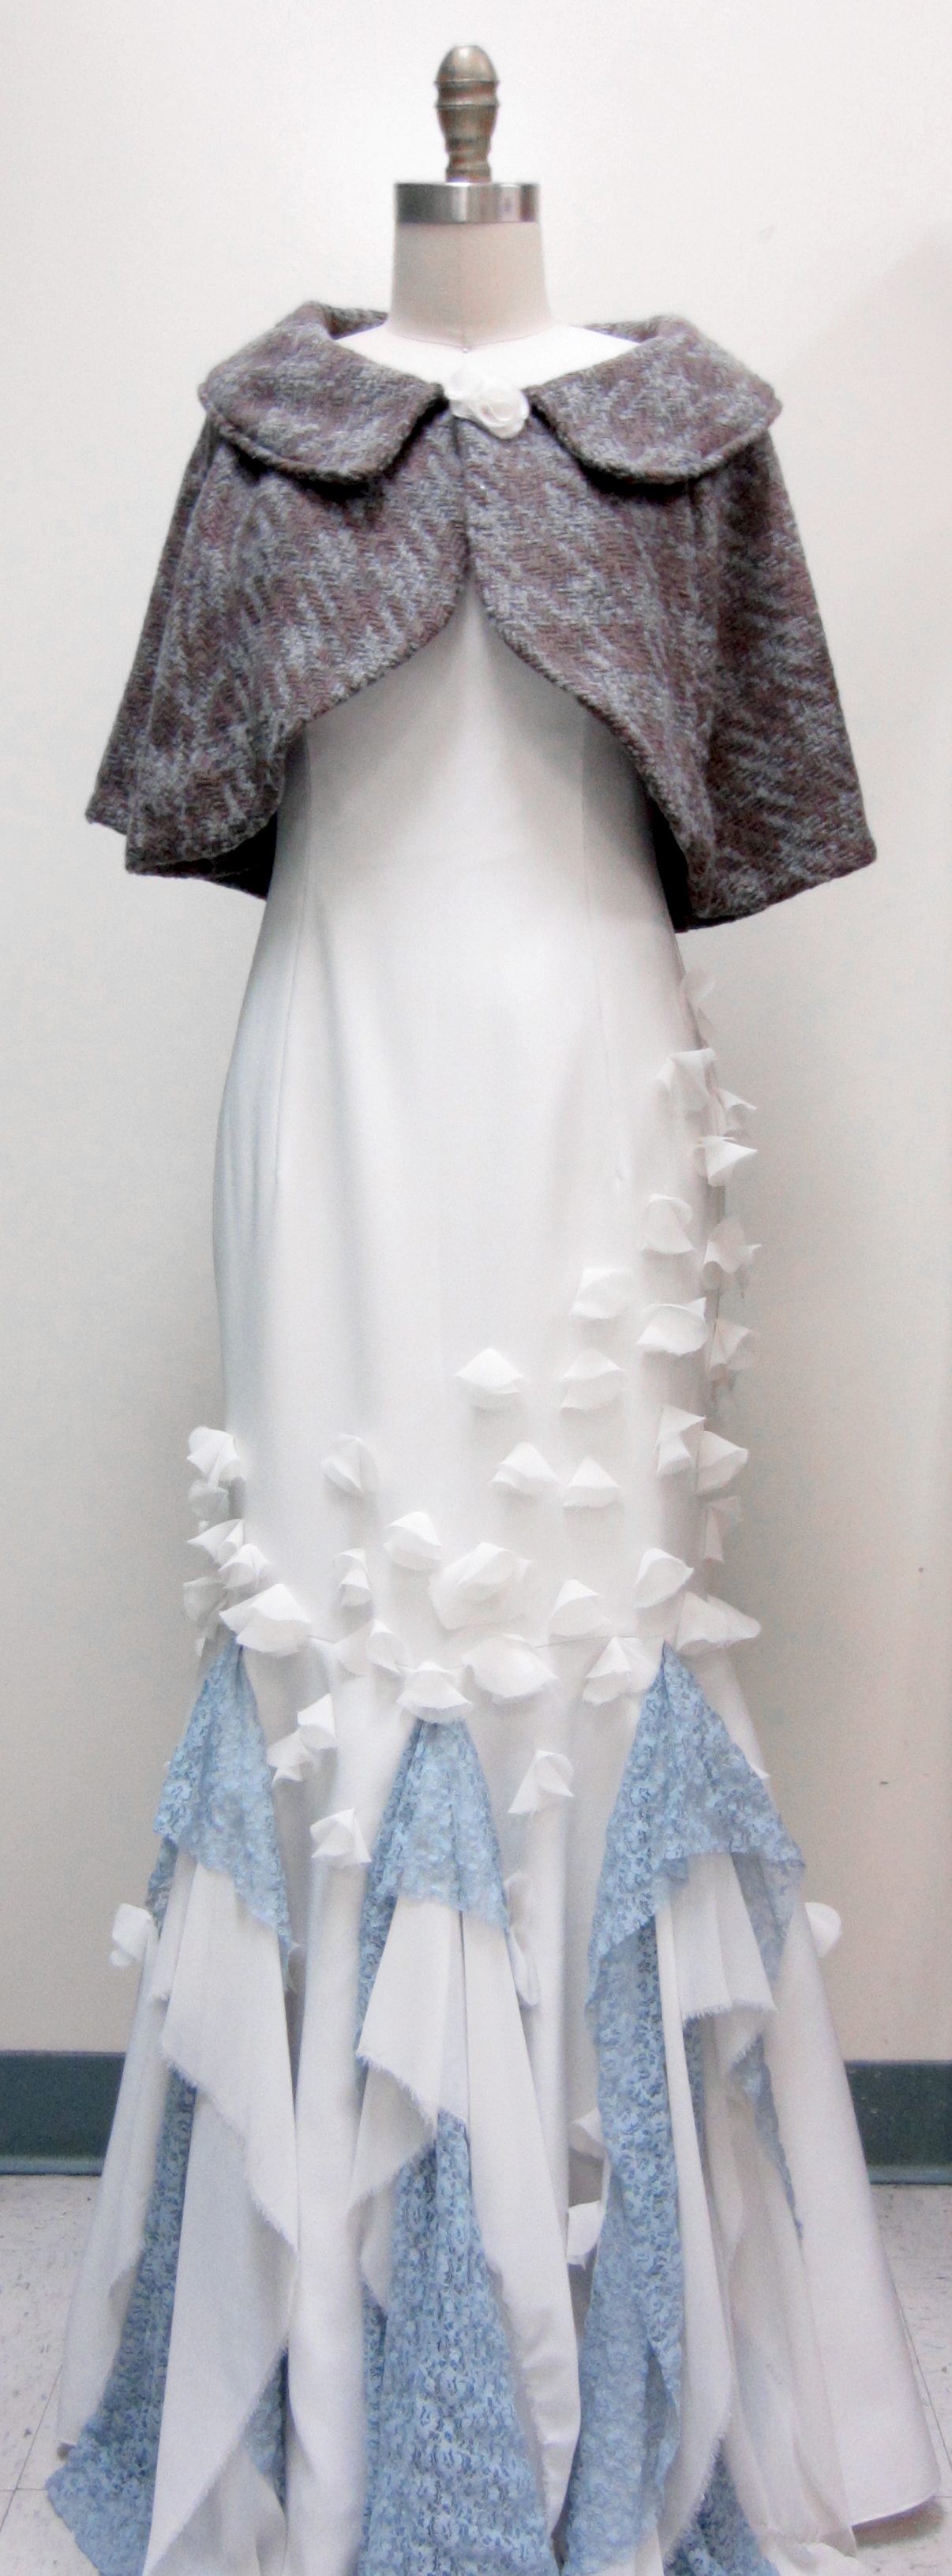
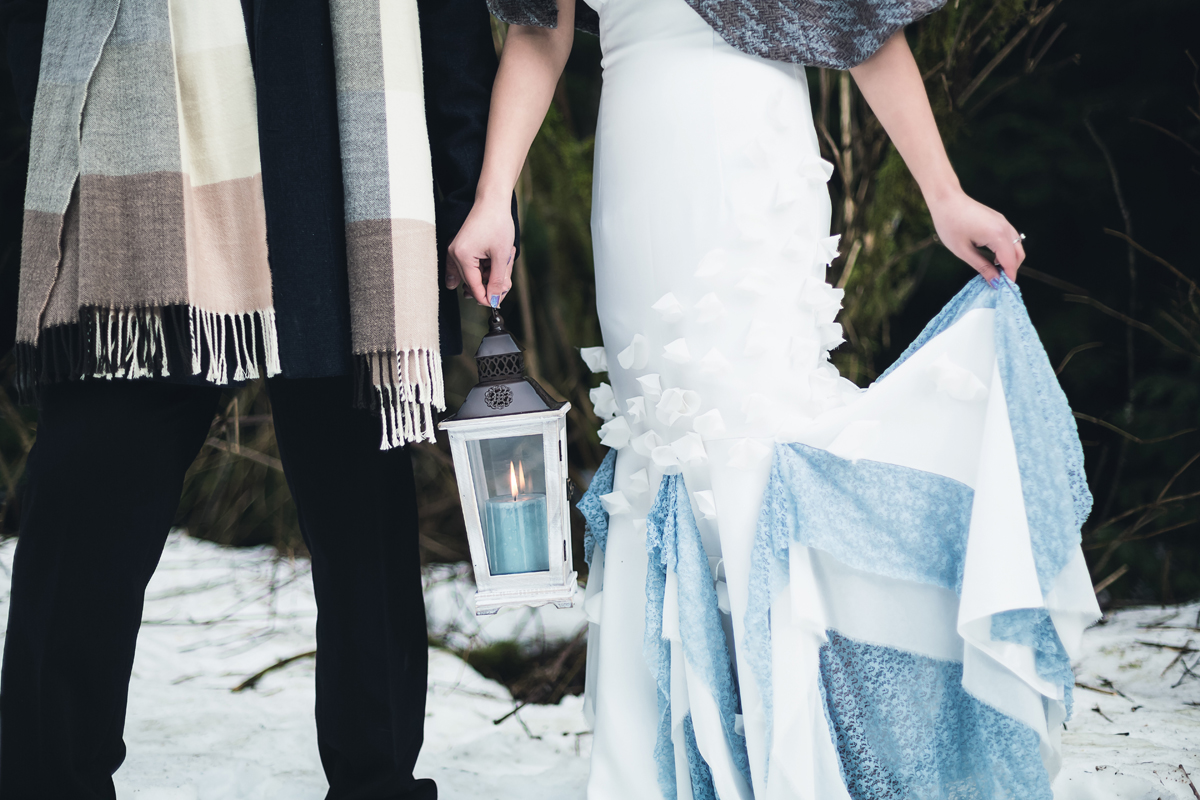
Now we can continue with the bottom of the dress. Measure carefully for a accuracy and write it down so you don’t forget (keep in mind seam allowances). There are 3 layers to give the look on the BCBG dress (the actual dress had 4 layers but way too much fabric to cut…)
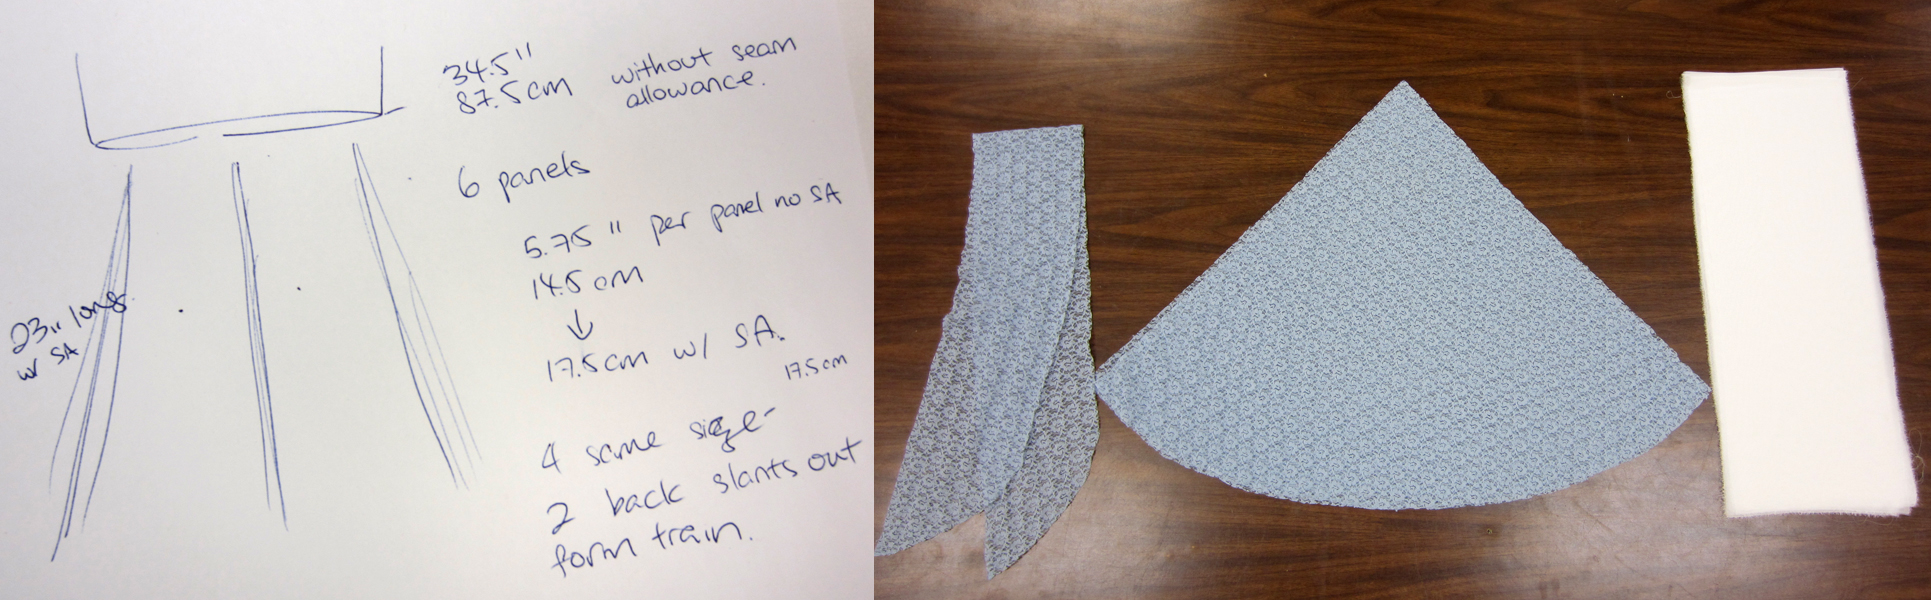
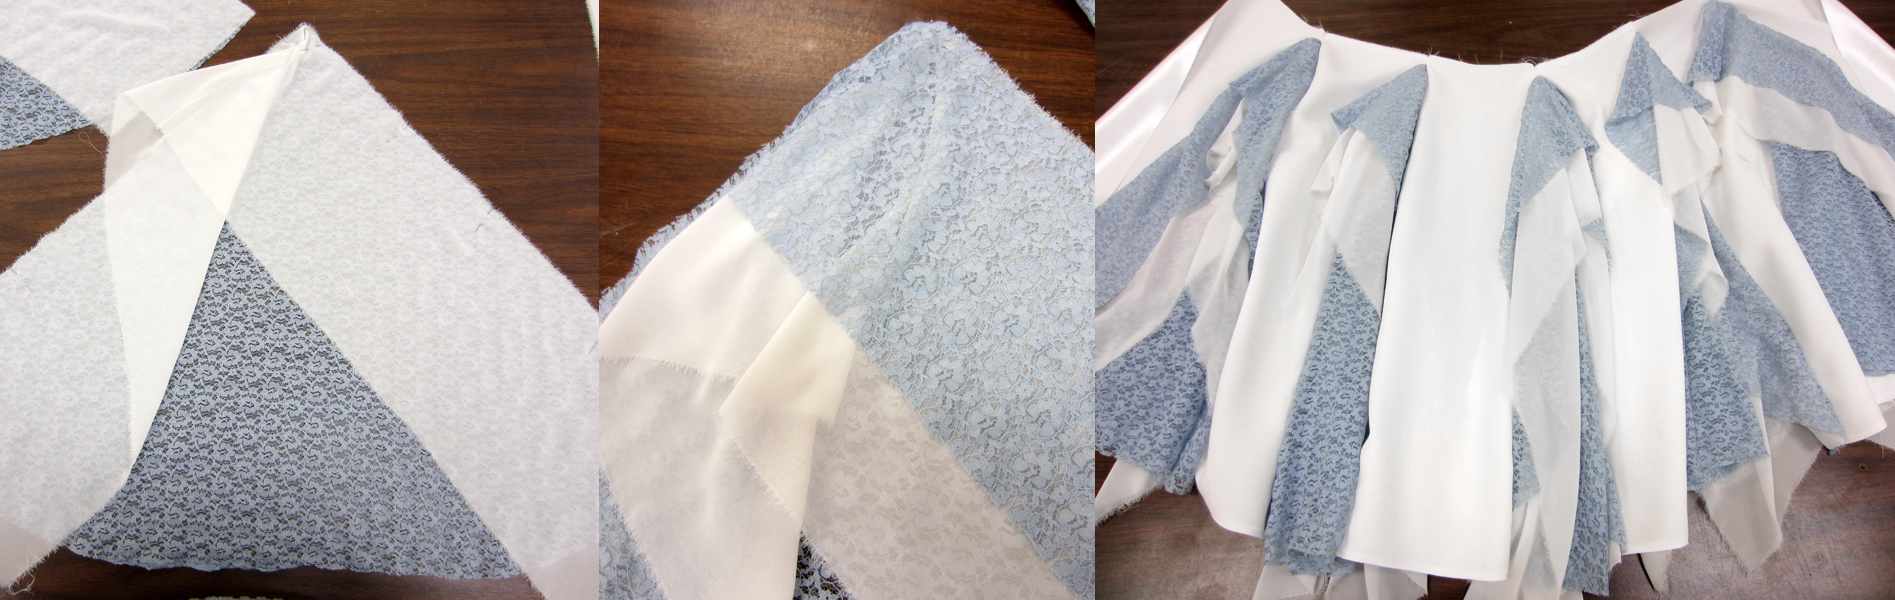
Then, sew each piece together individually. Make 6 of them. Attach them all together with panels of the dominant fabric (crepe in this case) in between. Attach to the bottom of the dress and we’re almost done.
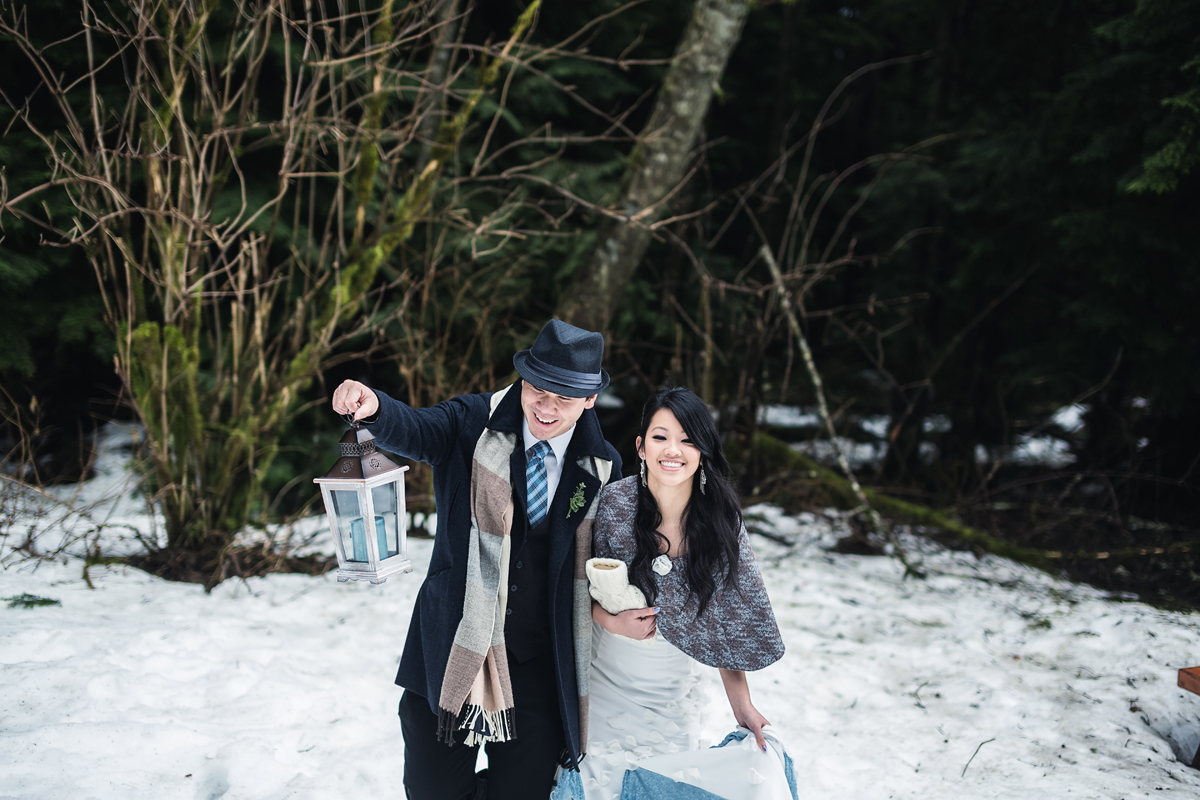
Since it’s a winter shoot, it wouldn’t be complete without some sort of cover-up. I have a pattern for a cape but the original design is way too heavy for the look of the gown so I made a few changes with muslin first to make sure it falls nicely at the shoulders.
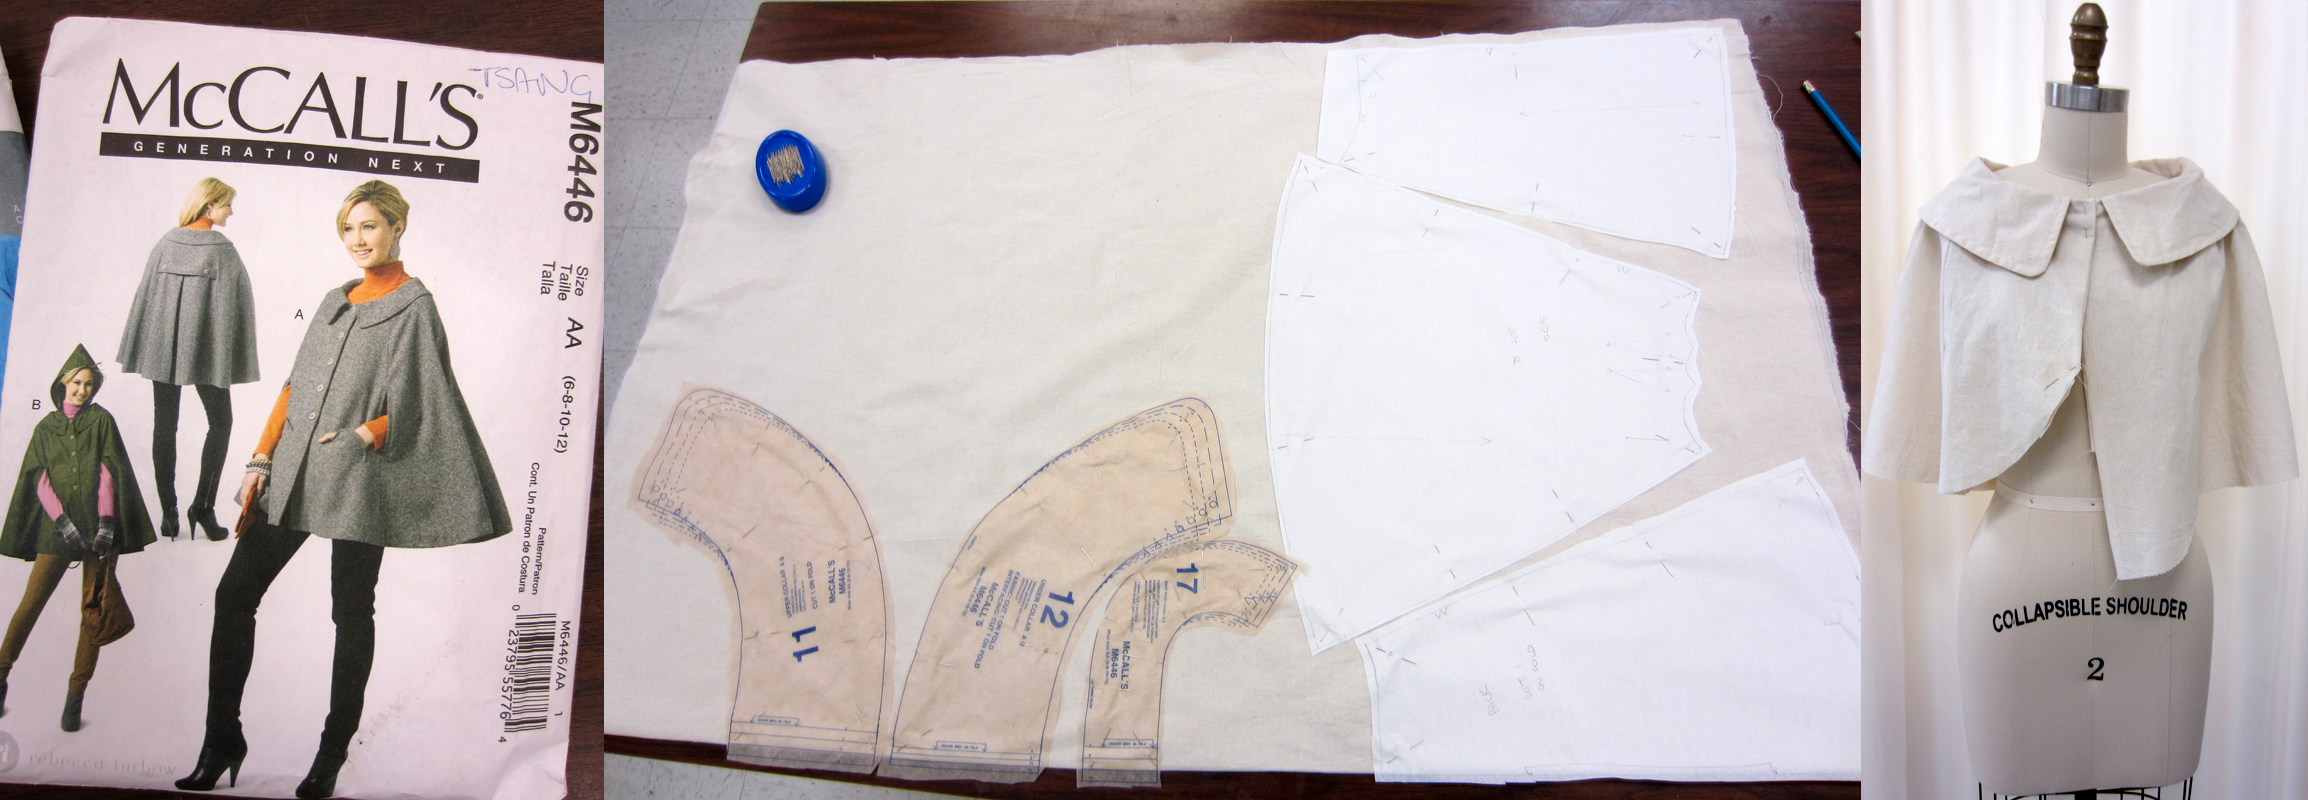
I personally have never worked with wool or any fabric I couldn’t mark with chalk, so I ended up learning something new too – tailor tacks.

The final process wasn’t too difficult except trying to sew through 4-5 layers of the wool. To close the top, hand-sew a hook and eye to make it easier. You can attempt to make a buttonhole and use a nice button but the machine I was using was just not reliable enough for me to take that chance. Instead, I made a simple flower using the leftover chiffon from the dress.

I didn’t get pictures of this part but I added little circles of chiffon (cut by Jason ![]() ) along the gown to give it the ‘snowflakes falling on snow drifts’ kind of feeling.
) along the gown to give it the ‘snowflakes falling on snow drifts’ kind of feeling.
I’m happy with the outcome not because it’s the most amazing design ever. I’m just so happy it’s done and fits well. To borrow a movie quote:
From failing you learn. From success…not so much!
AUNT BILLIE, Meet the Robinsons (2007)
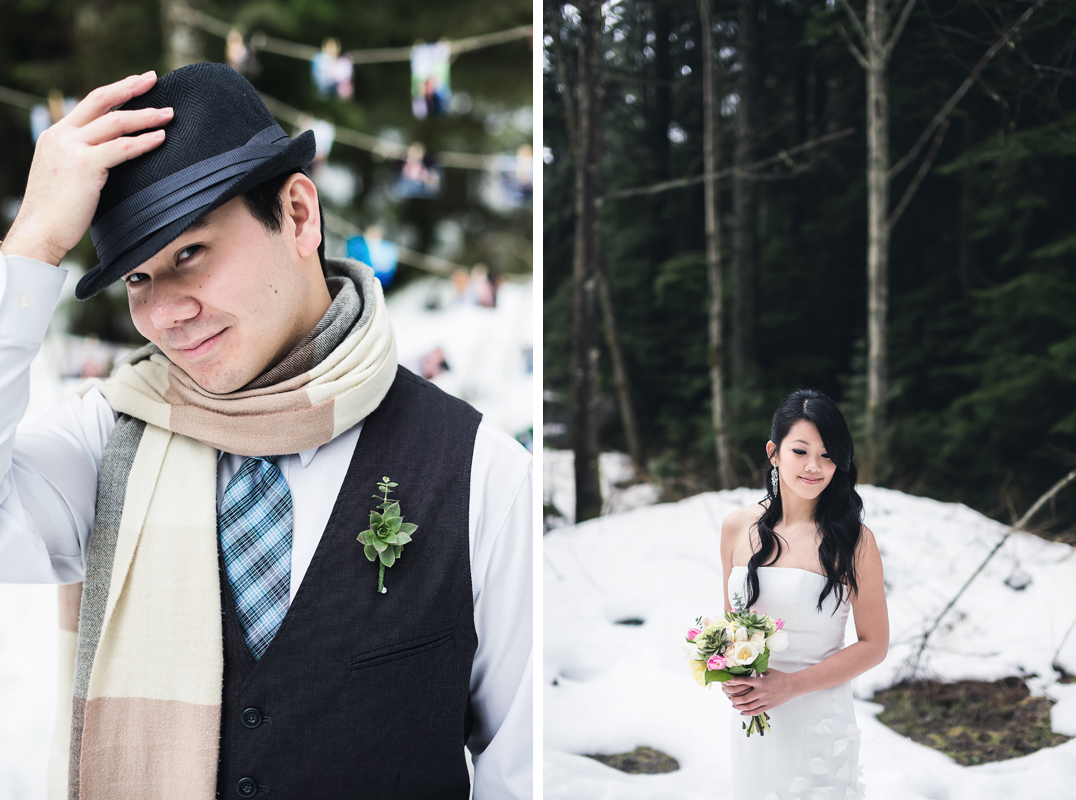
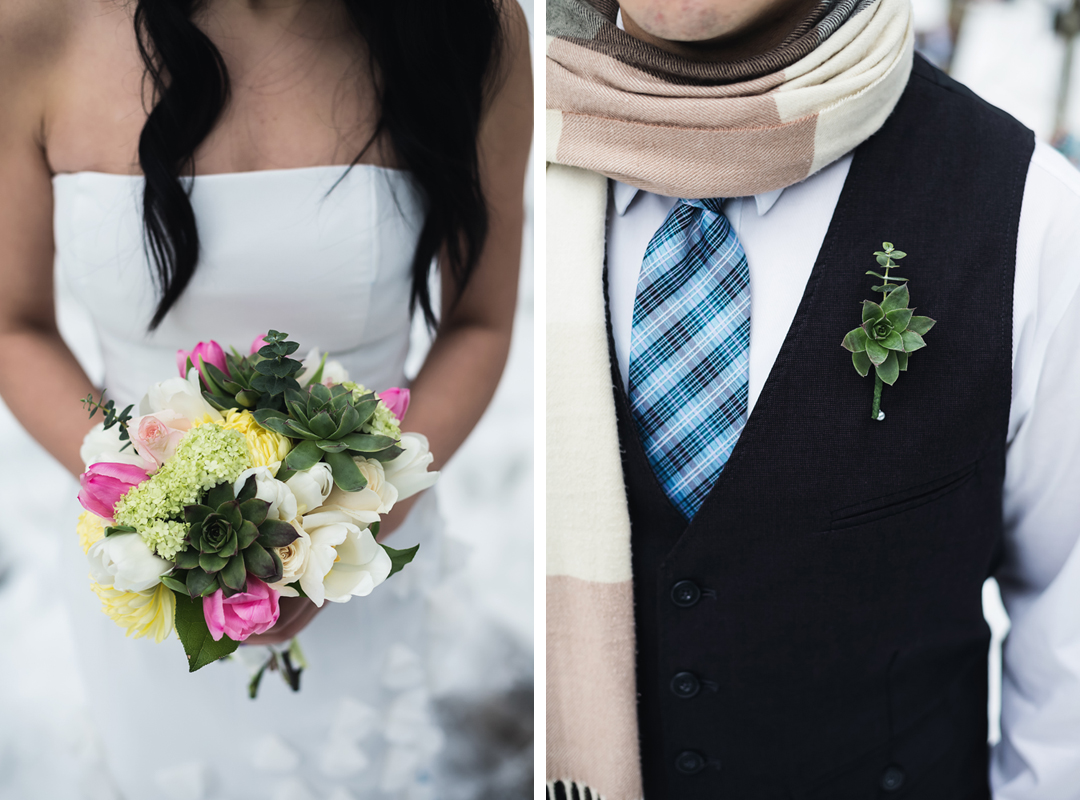
Photographer – Jun Ying of Kunioo assisted by the talented Miya Gu
Bouquet/boutonniere – Lisa Wong of Blush Floral Designs
Makeup/hair/styling – Elena Tsang (me!)
Special thanks to – Tiana Lam for the scarf; Dom Voo and Aaron Yip for lending us winter coats; Ursula Tsang for being our photo shoot assistant in the snow 🙂


This is absolutely gorgeous! How did you keep everything from puckering on the second foundation ? I can never seem to stop puckering on my projects. Thank you.
Thank you! I found that certain materials pucker more and I try to avoid those. For the second foundation, I basted the white fabric on top of white flannelette and it probably made it more stable. Hope that helps!
Gotcha. Thank you so much. I love both of the wedding dresses you did.
Kudos to you for actually making a dress for a styled shoot. You did an awesome job. And I love that cape.
Thank you! It’s fun to do and I wish I had time to make more.