Uncategorized

Take It With You – Makeup Eraser Sticks

While browsing in the beauty section of London Drugs, just killing time, not really expecting to find anything in particular, I caught a glimpse of these:


I was super excited.  As in my eyes bulged when I saw them and I was smiling to myself like a crazy person.

If you have eyes like mine (which a lot of Asians do) you’d find that even waterproof, smudge-proof products – especially when you use black – don’t always stay put and often transfers down to the under-eye area.  Now there are some products that absolutely don’t move at all (i.e. MAC Liquidlast Liner) but they don’t always give you the look you want to achieve.

Anyways, when I know I’ll be wearing makeup from day to night, I always carry a travel pack of q-tips and a bottle of eye-makeup remover with me, which adds weight and is bulky when you’re carrying, say, a fancy clutch.  Another option is travel size makeup wipes but they’re expensive and wasteful for small touch-ups.

So the makeup remover liquid stays in place until you the snap the end with the purple strip.  Then the makeup remover moistens the other end and you’re ready to use it!

Now the question is, how effective is the remover?  Most drugstore ones I’ve used have been pretty useless and requires a lot of scrubbing which irritates my eyes.  So here’s a swatch test using a liquid liner and dark shadows.

Not bad!

So PROs:

  • Lightweight and small – perfect for those on-the-go!
  • Effective formula to remove darker makeup.
  • Oil-free so it doesn’t make the other parts of your makeup run if you just want to touch-up.
  • Perfect for brides as part of their emergency kit.
  • Cheap or expensive?  It’s $5.99 so I’ll let you decide.  Decent for me.

No cons as far as I know but maybe I’ll figure it out after using it.

Enjoy!

Uncategorized

Clean Supreme for Cheap

Alright so who has seen this brush cleaning mitt?  It seems to be alSigma Spa Glovel the rage lately on youtube from all these makeup gurus.

When I first got an email about Sigma Beauty‘s new product, a couple of thoughts flew around my head at once:
“Yes, finally something like this on the market!”
“Darn! They stole my idea” >=|
(Although this wasn’t what I had imagined in my head.  Oh I wish I knew how to go about inventing a product and getting it made :})

After going on the website and watching a demo video of how it works, I’m thinking:
“DANG it’s expensive for an oven mitt!” – It’s $39 usd.
“It looks like it might work…kinda chunky though…not a lot of movement allowed and feels like it might slip off my hand while I’m washing”

Even after that, I was tempted enough to attempt to order it for one reason alone and also the same reason I wanted to invent one in the first place – to prevent my hands from drying out like crazy.  I wash my brushes after each client and I have a lot of brushes.  Swishing each in my hand with soap and hot water does no favours to my already-dry skin.

So I proceeded to checkout and WHAT THE HECK $11 for shipping?!  Okay, I’m too frugal (i.e. cheap) to pay $51 for an oven mitt.

As I was shopping a few days later at one of my fave stores – Daiso at Aberdeen Centre – I came across this little silicone face scrubbing tool:

It was $2 and I thought the texture and material is probably the same as the oven mitt so SURE let’s give it a go and see what happens.

My process:

  1. I wet my brushes lightly with water.
  2. Dip it into a soap solution and scrub a couple of times on the pad (in the second photo, I literally just swished 2-3 times over the surface).
  3. Rinse with warm water while scrubbing along the pad to remove excess soap.
  4. Push out excess water with clean index finger and thumb and lay them on a shop towel (more sturdy, sanitary, and absorbent)

Verdict?
I LOVE IT!

Not only did I clean my brushes in half the time thanks to the small bumpy texture, it actually removed bright red lipstick stained onto my lip brush that I normally could not get off without alternating 99% alcohol and an oil-based makeup remover.

Sure my hand still got a bit wet but nothing to compared to what it was like before.  I’m sold!  The only thing I would change is to make the surface area as big as my palm for my bigger fluffy brushes.

I made an attempt at Daiso again to see if they carry a silicone scrubbing pad for the body (^_~) but alas they did not.  Maybe one day!

Uncategorized

Post-Wedding Bliss

To the past brides out there – ever get the feeling that your wedding is not really yours?

You have to consult with parents to make sure that the dress is appropriate, the make-up is not too out there, the hair is formal, the food is acceptable, ya di ya da.  At any rate, Paula would have looked good in a rag and the wedding definitely was her in many ways but only the side of her that can be displayed at an ‘appropriate’ wedding.

Isn’t she lovely?  Yes, that is yours truly by her side.

For me, I always recommend the bride to go with the ‘look back and won’t regret’ route with regards to hair colour, hair style, make-up, etc.  However, the au naturel approach doesn’t always apply because some people truly do not feel like themselves when, for example, they keep their natural hair colour.  That’s why hair, make-up, and styling can be so cool – you can show the world who you are as an individual or as a couple.  And if you can’t do it on the wedding day, you can do it with a post-wedding anniversary photoshoot 🙂

Vivid Moments Photographers (Raymond) is very fashion-oriented, paying particular attention to posing which highlights a woman’s best features.

Paula is all about fashion and her evening gown didn’t get a hint of justice on the big day.  First off, the gown is more risque which is so her style.  Second of all, it’s from Japan – the country where the couple were engaged and where her style was based for the last few years.
Unfortunately, there were insufficient photos from the reception to capture it’s beauty.  But no matter!  This time around, we had the chance to give her the hairstyle and make-up of choice to match the fab dress.

[Unedited Snapshot]

Makeup:
Inspired by models in Japanese fashion magazines – the more natural type, not ganguro-style or the ones where your lashes are attached 1cm below your actual eyes.

To get the look –  Use purple shadow on the lids and blend with a brown at the crease.  Thin black eyeliner and a bit of purple glitter below the lower lash line (if you can’t already tell, purple is her fave colour).  A medium coverage foundation to perfect the skin, topped with a cool pink, slightly shimmery blush to add a glow and a bit of bronzer to sculpt cheeks.  Lip colour is also a cool toned, muted pink with a thin layer of gloss to add fullness.

Hairstyle:
Half-good-girl-half-bad-ass is probably the best way to put it.  This was inspired by a character in a Taiwanese drama who wore her short hair similar to this on her wedding day.  Paula coloured her hair in Japan which she has been itching it do ever since she had to grow out her natural locks.  Though deemed inappropriate for the actual wedding, this style definitely showcases Paula’s multifaceted characteristics.

To get the look – part the hair and section away the fringe.  Curl hair using a clampless iron.  Section, twist and pin (into the twist) the side opposite the fringe.  Curl and position fringe so it swoops nicely into the curls.

And here are a few more!

Your exclusive BTS look:

Uncategorized

Floral Glamourous

Wedding season nearly makes blogging impossible so some of you may have already seen the images months ago but it’s never too late to take a closer look!

I worked with Foroogh earlier this year (read here) and we both planned to work together again.  Another talent I was planning on working with for some time now is Vancouver fashion photographer Kenneth Kwok.

I wanted to do a classic glam shoot with a little black dress and a bold lip.  Kenneth wanted to do a outdoor shoot with a floral headpiece.  Foroogh was flexible and up for trying something different, in which case, both these looks are quite different from her gothic style.  So after much consideration (-_-) we chose to do both!

One of the biggest challenges of fulfilling an inspiration for a shoot so far has been styling.  My closet has been frequently raided for my shoots because, to be honest, I have way too many outfits for my own good and it’s nice to make use of a dress I’ve worn only once.  But not everything will fit the model and not everything can fit the theme either.

Some items just aren’t easy to find in stores if they’re not the latest trend.  So Foroogh and I hit up Dressew (the biggest fabric warehouse located downtown) to pick up a couple of things to create the outfit I had in my mind.  We found everything we need within half an hour and she offered to make the headpiece while I made the outfit.  What a team! 🙂

The hair style was a somewhat messy and wavy, meant to be blown in the wind.  The make-up was what I wanted to focus – a warm purple, glittery ‘n glossy eye, flawless flushed skin, and nude lips.  It was a mistake to apply the face gloss so early on in the shoot because as many of you who have tried, gloss is not meant for longevity.  It was creasing a lot throughout the shoot, but fortunately, that less-than-perfect look was ironically perfect for the theme and setting.

The shoot was amazing and I did more than beautify, I was the official wind-maker, flapping around a reflector multiple times to create wind-in-hair effect.  Here are some of my fave photos (edited by F).  Check out the final images here!

Floral took longer than expected so we didn’t have quite enough time for Glam.  Either way, we made it work.  I pulled out muh baby – the black dress I had my eye on for awhile selling for $100 and found it finally on sale for $40 which was the last one on the rack and was actually my size!  I was practically beside myself with stress when I handed it to Foroogh with the tags still on, but sacrifices must be made and she was very careful with it 🙂


Make-up was a bit of a twist from the classic red lip, winged eyeliner look.  The eyes looked winged when opened, but was a shaped, blended shadow when closed.  I wanted the lips to be classic but modern so I opted for a fuchsia colour instead. We also thinned out her brows for this look so it’s more polished than the au naturel Floral style.

I started with her hair swept to one side but it ended up looking too ‘prom’ than glam so up it went – a giant, teased bun wrapped with a lace braid.  It’s actually the perfect hairstyle for all the ladies with long hair when you want it out of your face during hot, sweaty summer days.

Once again, a few faves here and the final products here.

Uncategorized

Shelayne Designs

In early February this year, Jun messaged me to ask if I was available to do hair and make-up for Gina (whom I’ve worked with before and loved) since she’s modeling for her friend’s fashion portfolio.  Kunio Photography photographed the shoot.

I loved fashion so it was a no-brainer that I would want to do this.  So on that fatefully cold day of Feb 18th, we started early.  However, it was still a chilly wintery morning, when the sky was pitch black and everyone was in hibernation mode.

Gina had been up all night, and shared some hilarious stories btw, so I give her props for being able to show up at all.  The fab designer Shelayne showed up soon after with her garment bags and fabrics.

There were three gorgeous dresses which Shelayne sewed it up the day before and pulled an all-nighter.  Impressive! I was given a run down of the level of work required to stay in the fashion program at Kwantlen Polytechnic University.  For all those aspiring designers out there – be prepared!

Because I had never seen the dresses before, I just worked with the information and direction I was given on the colours and feel of the look.

To our surprise, by the time we arrived on location, it was snowing!!!  Most of us were bundled up anyways but poor Gina was fully exposed throughout the three hours of shooting and was freezing!  When we finally got to our first location, the snow had stopped.  Between every long enough pause, we tried to wrap the jacket around Gina.  The saying “beauty knows no comfort” is particularly true that day.
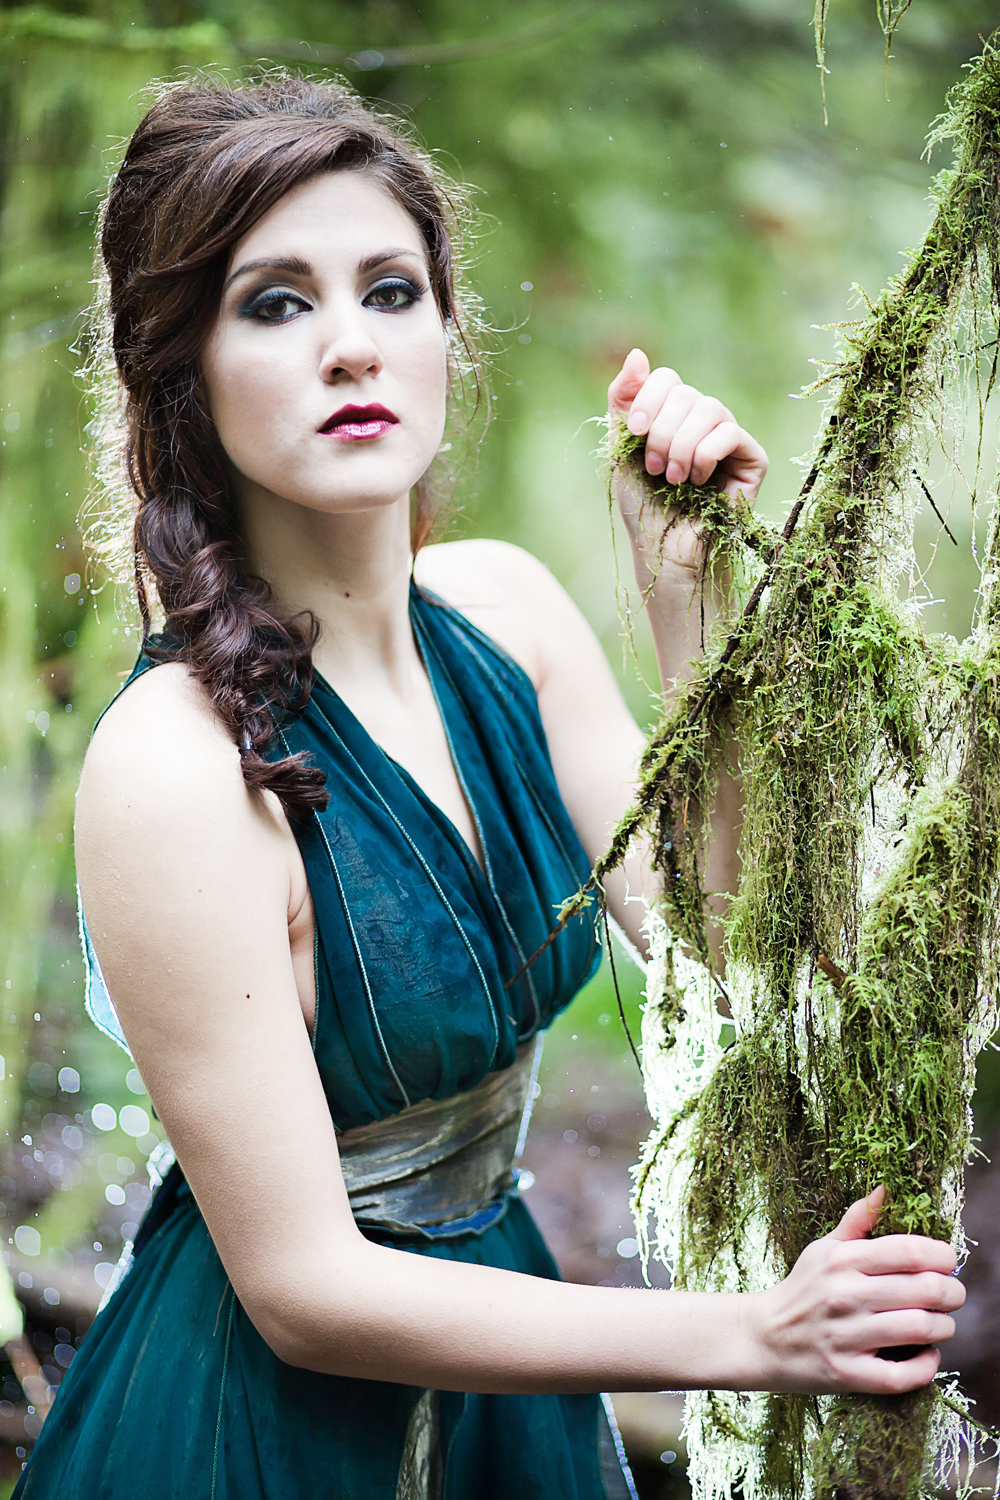
#1 Forest Fairy

What a pretty dress!  It definitely requires a lot of character to pull it off.  Shelayne was the most concerned about this one because she thought that it was kind of ‘out there’ and not really within her comfort zone since she likes casual wear.  But we were all blown away by it and it fit perfectly into our setting.  For this look, I chose to do a heavily lined eye with deep contours and red lip to contrast with the green of the dress.  A messy, voluminous hairdo with a loose fishtail side braid complimented the dress perfectly and showcased the back of the dress.
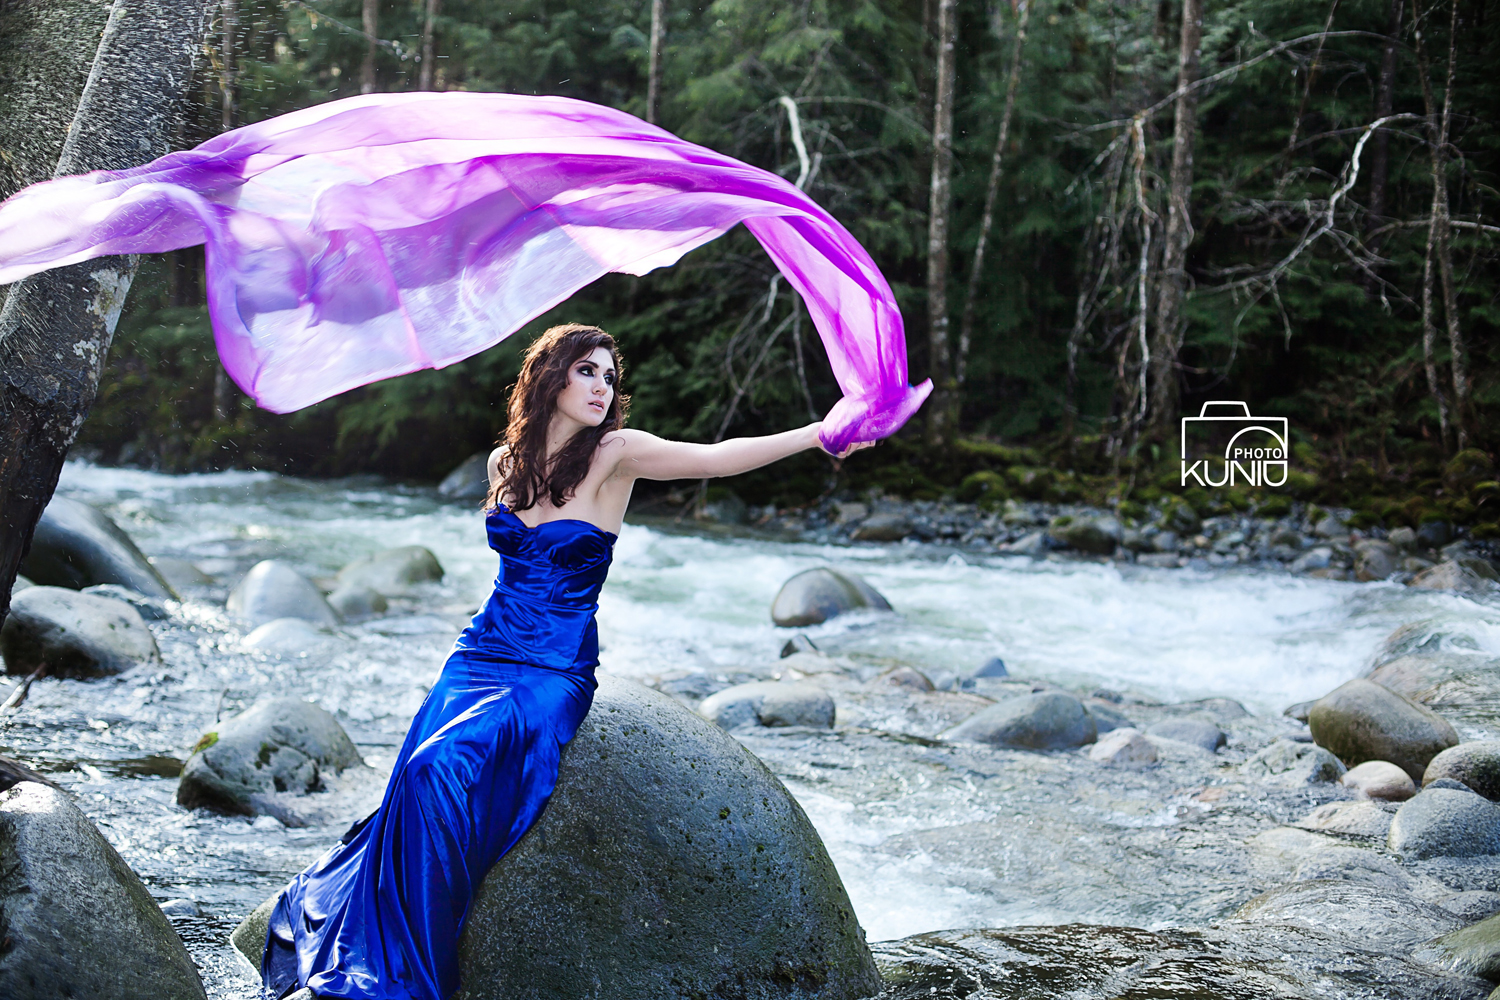
#2 Emerging Mermaid

Okay I have to say by this point, I was exhausted.  Yes, it sounds ridiculous since I was bundled up and Gina wasn’t.  But going up and down muddy, wet stairs and walking on tree roots and rocks while carrying my Zuca case…I was unprepared.  I should have worn rubber boots instead of sneakers (*mental note for next time).

So Gina changed dresses out in the wilderness with me, Shelayne, and Jun surrounding her with random items to prevent passers-by seeing her.  Then, I adjusted her hair and make-up to match the shoot.    Removed the red lips and went for a nude and intensified her eyes with deep blue, purple, and silver hues.  Hair was released and pulled down, flung around like the nature girl she is.


Can you take your eyes off that vision of perfection?  The blue was striking against the river and the rocks.  Unfortunately, we weren’t able to capture the back of the dress, which was pleated at the bum and then opened onto a short train.  If I were to wear an evening gown, this would be it!

That ends that day!  Gina was almost at the point of hypothermia.  Any less of a man (or woman) would wimper in freezing cold water during the winter but Gina was so wonderfully brave.

Due to a clash of schedules, we couldn’t complete our final dress until April 29.
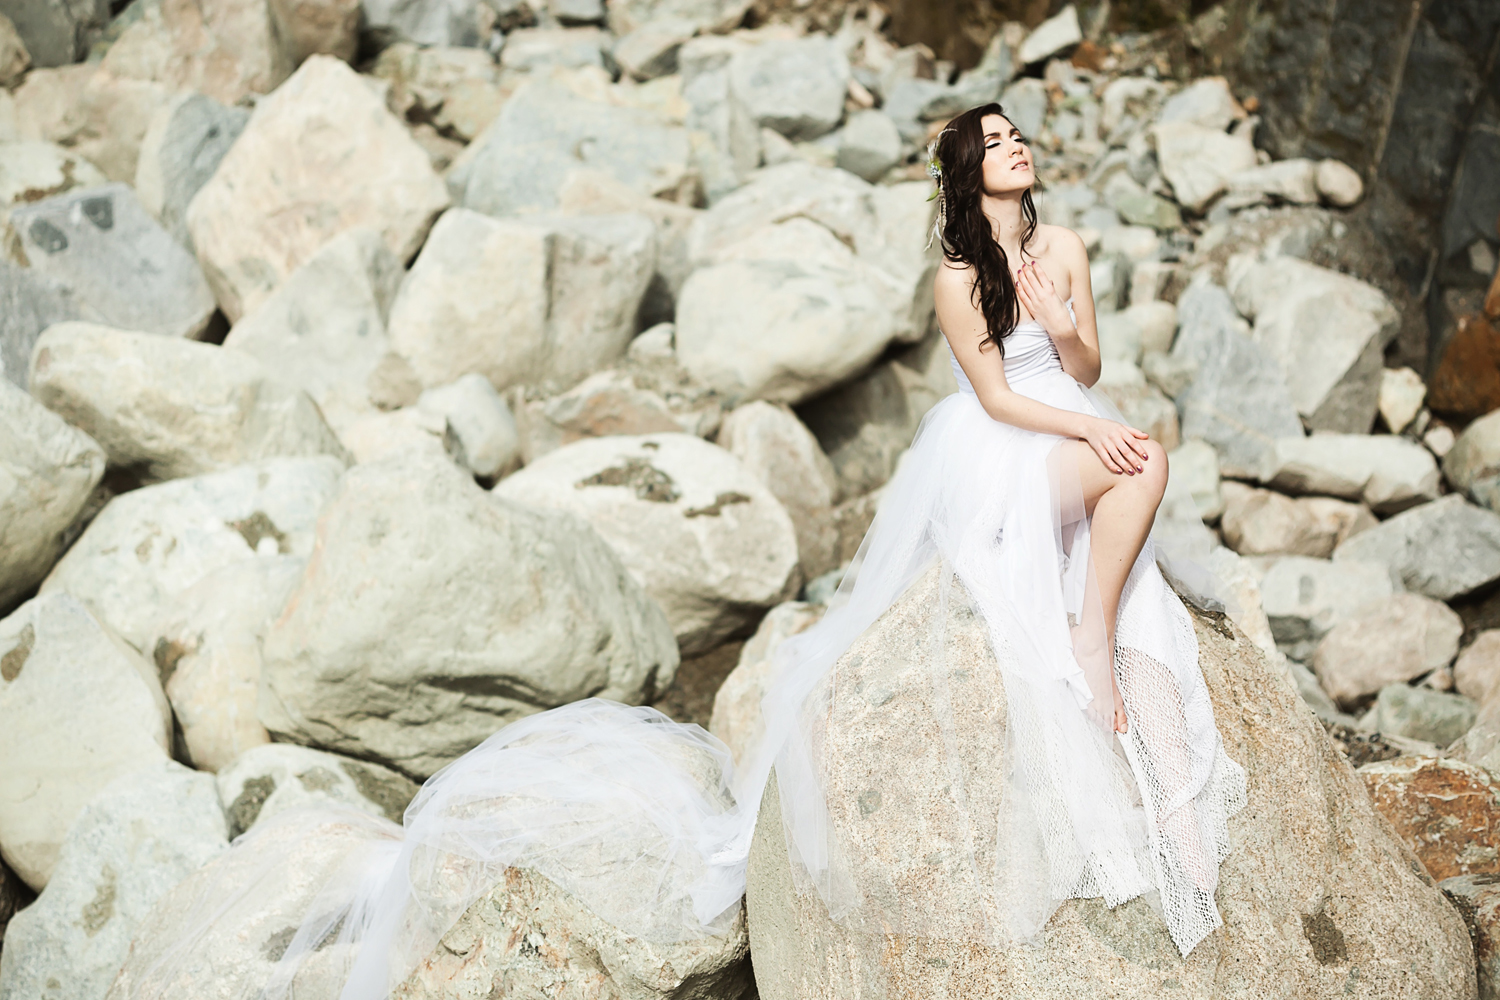
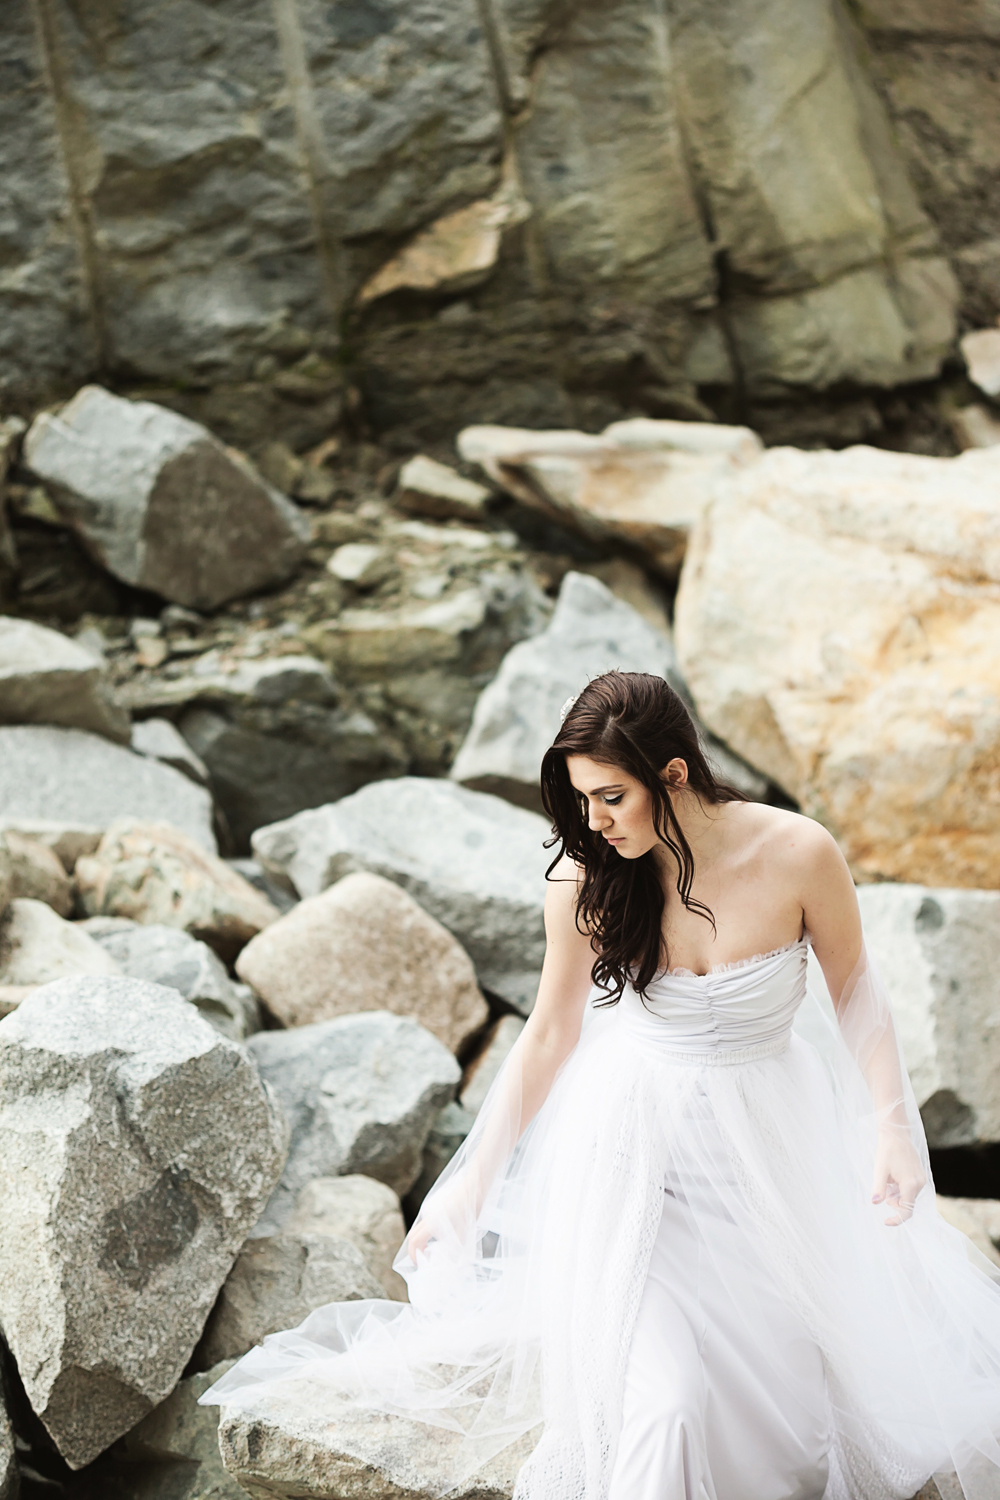
#3 Nature’s Bride

So for the final dress which turned out to be bridal-inspired, I went for a super clean contoured look and did a half-up rendition of the first hairstyle to keep within the theme of the entire line.  Shelayne also randomly picked up the feather headpiece I made for a previous shoot during the morning prep, so we incorporated that into this shoot as well.  The rocky location was the perfect backdrop and I couldn’t be more happy with the outcome!

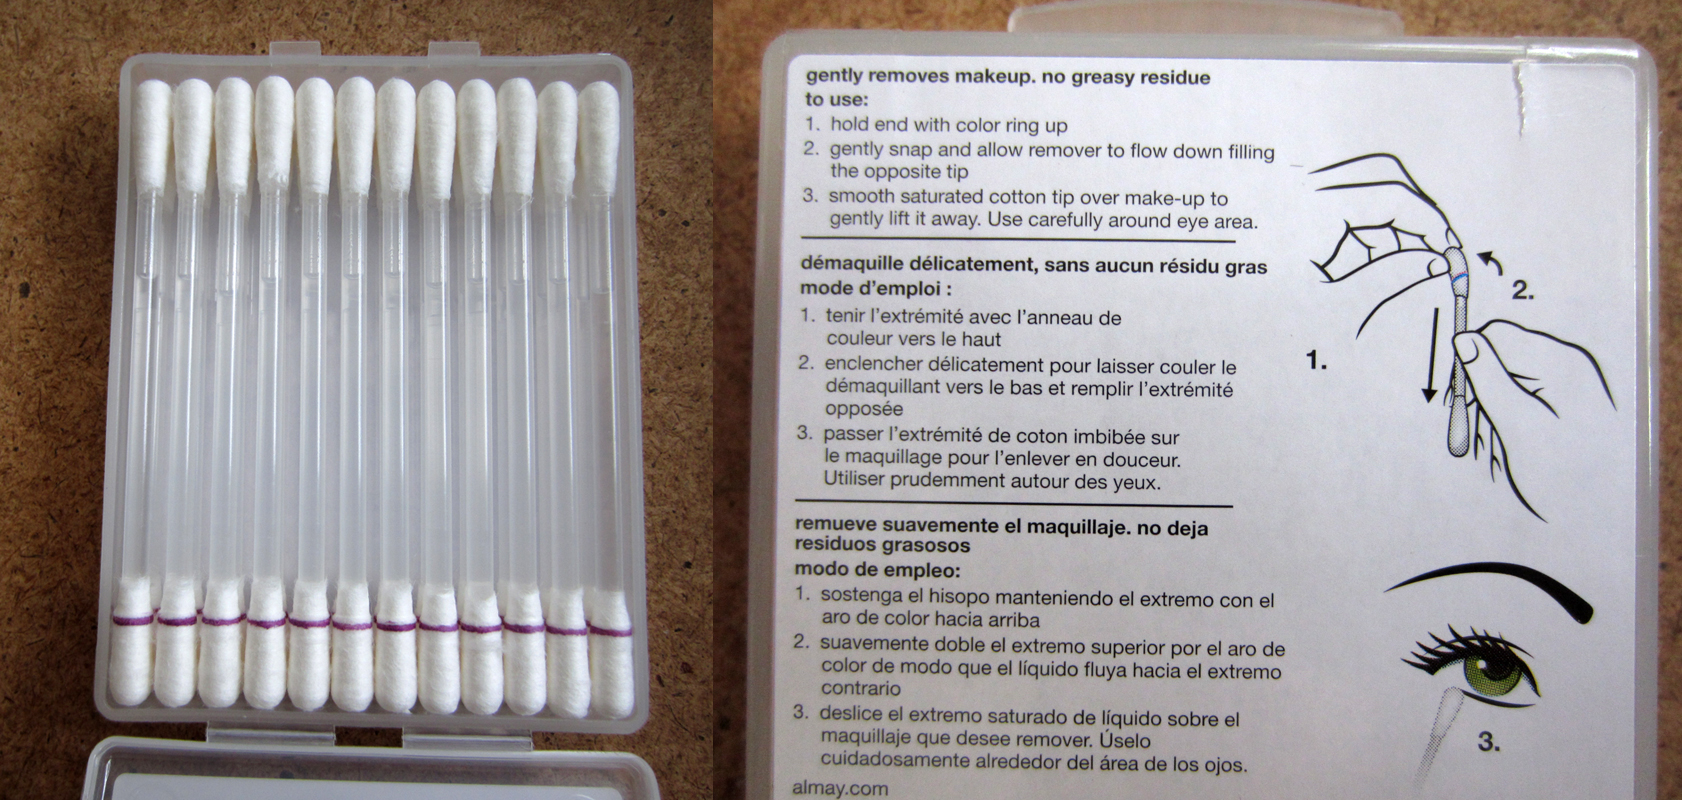
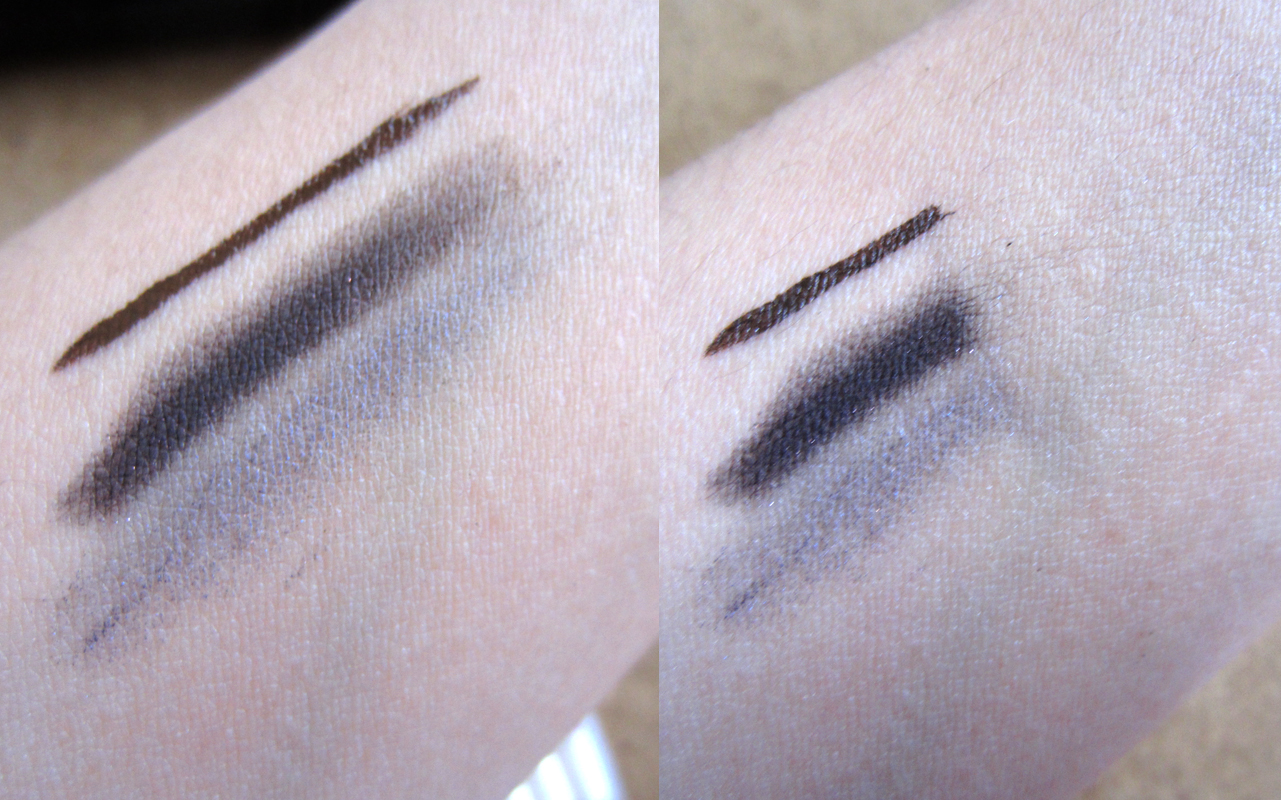
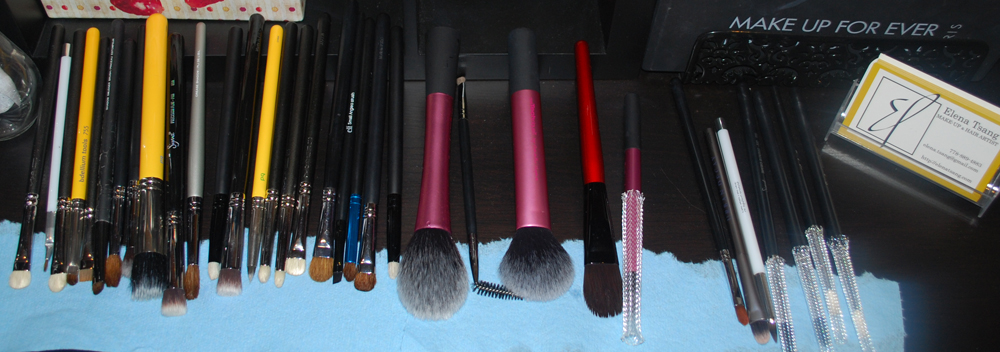
Check out close-up images of the hair and make-up in my beauty portfolio.

And check out more images at Kunio Photography (BTW I have to give Jun full credit for arriving on location over an hour before we showed up each time, battling the elements, and scouted around for the perfect location.  Such a dedicated pro!)

I will update you of Shelayne’s public portfolio as she inevitably rises to stardom.